Monday, October 13, 2014

For The Oreo Lovers- Cookie 'n' Cream Cake!

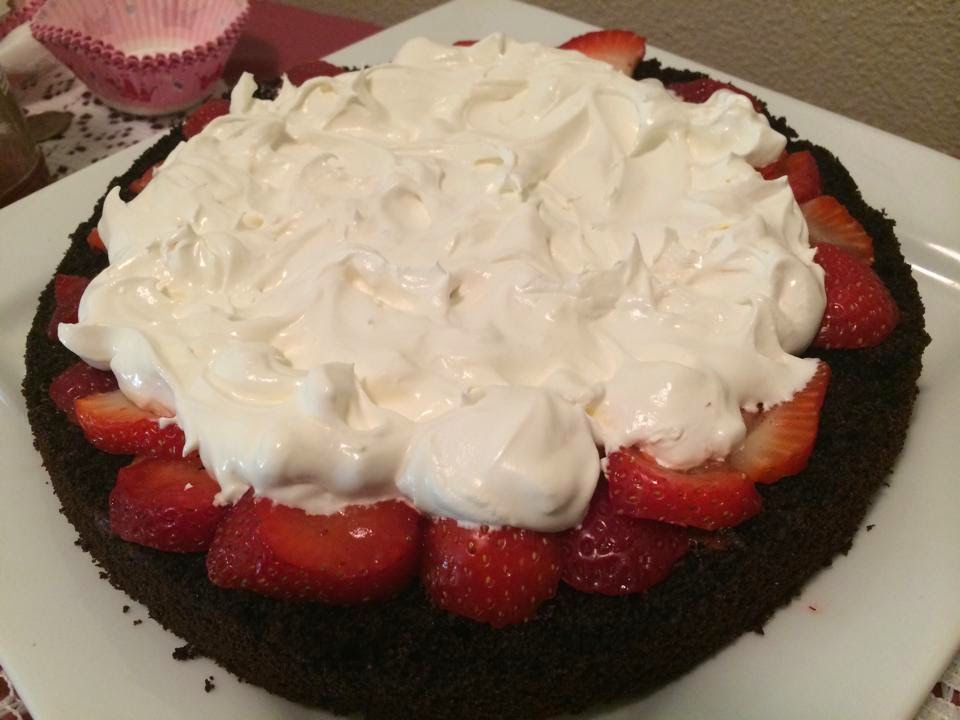
Oreo Cookie Cream Cake

So, it was a birthday of a very special sister, Mun apu. I got to know about her Birthday in the afternoon and we (the gang here in Purdue) were supposed to give her a surprise by going to her place at 12 midnight. I was planning to bake a cake with oreo for the last few days and I thought this could be a wonderful opportunity to play with it as you can't get wrong with oreo!! I was very happy to see that the birthday girl was over the moon by seeing her cake and our friends were ecstatic too! It is super easy to bake, frost and decor! The fascinating part- not only the taste but it does look scrumptious! 


Ingredients: 
For Cake: 

- 2 cup all purpose flour 
- 1 cup cocoa powder
- 1 teaspoon baking powder
- 1 cup milk
- 1 teaspoon salt (optional)
- 1/3 cup vegetable oil 
- 3 large eggs (room temperature) 
- 1 teaspoon vanilla essence
- 1 cup brewed coffee (hot)

For Whipping Cream:


- 2 cup heavy cream 
- 2 teaspoon vanilla extract
- 2 tablespoon confectioner's sugar (powdered sugar)

For Oreo topping: 

-Oreo Cookies - 24-28 cookies

Process: 

1. Preheat the oven at 350 F. 

2. Stir together all the dry ingredients listed for the cake and keep that aside. 

3. Now in a separate bowl,  add milk,  oil, eggs and vanilla and combine them all.  Next, add the dry ingredients (step-2) slowly into this mixture.  Add the coffee. Don't worry if the batter is thin. 

4. In a greased 9 inch pan, pour the batter and bake for about 30-35 minutes. Baking time varies on the pan size so keep an eye when 25 minutes are over. Insert a toothpick and if that comes out clean, your cake is ready. Rest is aside to cool. 

5. Now when the cake is cooled down, slice is into half (horizontally). 

6. In a bowl, beat heavy cream until it forms stiff peaks. Now add vanilla and sugar. Don't over beat it, then it will become like butter. Now mix 14-16 crushed oreo cookies to the whipping cream. Spread half of the whipping cream over one slice of cake and close the lid with other slice of the cake.

7. Dollop the remaining whipping cream over the cake. *Optional: now if you wish, you can make small disk size decors with chocolate ganache or frost and dip one oreo cookie onto each disk. In the middle, crust 3/4 leftover oreo cookies and your cake is ready to go into the refrigerator. You can dip the cookies without the ganache or choco-frosting too. 


8. Keep it cool for at least 2-3 hours before you cut slices for the crowd. 


Enjoy!  


Saturday, October 11, 2014

Eid-ul-Adha Special: Toasted Coconut & Cherry Glazed Vanilla Cake!

Toasted Coconut & Cherry Glazed Vanilla Cake 

For many days, I wanted to bake a cake using coconut flakes. Eid-ul-Adha gave me a good opportunity to experiment with the flakes and guess what, my guests loved it! Looking forward to try macaroons with coconut flakes next time. Until then, enjoy this super-easy but exotic dessert for your dinner party! 


Ingredients 

For Cake: 
- 2 cup all purpose flour 
- 1 teaspoon baking powder
- 1 cup milk
- 1 teaspoon salt (optional)
- 1/3 cup vegetable oil 
- 3 large eggs (room temperature) 
- 1 teaspoon vanilla essence
- 1/2 drops of food color (I have used yellow and pink)

For Coconut & Cherry Topping:
- 1 1/2 cup shredded coconut (sweetened) 
- 1 cup Fresh cherries
- 2 tbsp sugar 
- 2 tbsp water

For Whipped topping: 
- 2 cup heavy cream 
- 2 teaspoon vanilla extract
- 2 tablespoon confectioner's sugar 

Process: 

1. Preheat the oven at 350 F. 

2. Stir together all the dry ingredients listed for the cake and keep that aside. 

3. Now in a separate bowl,  add milk,  oil, eggs and vanilla and combine them all.  Next, add the dry ingredients (step-2) slowly into this mixture. If you are wishing for bi-color cake, separate the batter in two pans, mix yellow food color in one and pink in another. 

4. In a greased 9 inch pan, pour one colored batter and bake for about 30-35 minutes. Baking time varies on the pan size so keep an eye when 25 minutes are over. Insert a toothpick and if that comes out clean, your cake is ready. Rest is aside to cool. Next, bake the other colored batter in the same way. 


6. Toast the coconuts either on stove top or in oven using a baking sheet. Please hit this link: http://www.mybakingaddiction.com/how-to-toast-coconut/ to know more about how to toast the coconut flakes.


7. Now add fresh cherries, sugar and water in a pan and start making a syrup. Don't make it of too thick consistency. 

8.  In a bowl, beat heavy cream until it forms stiff peaks. Now add vanilla and sugar. Don't over beat it, then it will become like butter. Your whipping cream topping is now ready!

9. It is the fun time now. Spoon over whipped cream over one color battered cake, drizzle some toasted coconut flakes if you want. Now cover it with another cake as a lid. Pour remaining whipped cream all over the top and on the sides of the cake. Dust with generous amount of coconut flakes, don't worry if they start dropping. Most of it will stick to your cake.


10. Last but not the least, pour the cherry glaze over the cake and refrigerate it for 3-4 hours. I made it a day before Eid, and the next evening, it tasted divine!    
                 Finally, don't forget to save a slice for yourself... ;)


Let me know how did you like the recipe! Happy Baking! :)


Monday, September 22, 2014

With My Afternoon Tea: Scones!

Scones are known as single served cakes. It differs from the regular buns as it does not have any yeast in it but baking powder instead. The perfectly baked scones are very light and airy, can have or have not a glazed surface. It goes well as your morning meal or with the afternoon tea. I personally fell in love with them at KFC (they have a version of scones, named as biscuits there) and now-a-days I love their biscuits more than the chicken, haha! 

The amazing thing about scones is the ingredients which are used to make scones are readily available in every kitchen. Moreover they take only 30 minutes altogether to get prepared and bake. Let's have a look at the ingredients first and then we will explore the recipe! 

                                        Scones


Ingredients: 

1. All purpose flour- 3 cups
2. Sugar- 1/2 cup
3. Salt- 1/2 teaspoon
4. Unsalted butter -3/4 cup
5. Baking powder- 5 teaspoons
6. Milk- 1 cup
7. Egg-1


Process:

1. Pre-heat the oven at 400 F. 

2. First mix all the dry ingredients (flour, sugar, salt and baking powder). 

3. Take butter, beat an egg and add milk onto it. Mix this into the flour mixture slowly. 

4. Make a dough and place it on a flour dusted surface. 


5. Knead and roll the dough into 1/2 inch thickness and with a cookie cutter make round shapes. Place them on a greased tray. 

6. Bake the scones for 15 minutes. Check when they are turning golden brown. That's how you want it!

7. Next, place them over a kitchen towel and rub a bit of butter. (Avoid if you are on diet...;)


8.  You can eat the scones all by itself or add your personal touch by using cream-cheese, jams or nutella as fillings. I have also added some generous drizzles of chocolate syrup as that's how I like it! 


See, now that was easy! I can't wait to hear your choice of filling to go with your version of perfectly baked scones! Happy baking!

Saturday, September 20, 2014

Weekend Baking Bliss: Black Forest Torte!

Hi friends, hope you all are having an amazing time! This week, I had a very hectic schedule and when I came back home and had a fabulous weekend ahead of me, I was thinking of baking a Black Forest cake (Deshi style, Sumi's hot cake). Being decided to bake one,  I came up with the idea of using strawberry infused syrup instead of traditional cherries. During the weekend, I had a very fun night with my friends here in Purdue and had great reviews on this one! Hope you will like the recipe too. Let's start then!

Black Forest Torte 


Ingredients: 

For cake: 
- 2 all purpose flour 
- 1 cup cocoa powder
- 1 teaspoon baking powder
- 1 cup milk
- 1 teaspoon salt (optional)
- 1/3 cup vegetable oil 
- 3 large eggs (room temperature) 
- 1 teaspoon vanilla essence
- 1 cup brewed coffee (hot)

For Strawberry glaze: 

- 10-15 fresh Strawberries 
- 2 teaspoon white sugar
- 2 tablespoon water 

For whipped topping: 

- 2 cup heavy cream 
- 2 teaspoon vanilla extract
- 2 tablespoon confectioner's sugar 

Process: 

1. Preheat the oven at 350 F. 

2. Stir together all the dry ingredients listed for the cake and keep that aside. 

3. Now in a separate bowl,  add milk,  oil, eggs and vanilla and combine them all.  Next, add the dry ingredients (step-2) slowly into this mixture.  Add the coffee. Don't worry if the batter is thin. 

4. In a greased 9 inch pan, pour the batter and bake for about 30-35 minutes. Baking time varies on the pan size so keep an eye when 25 minutes are over. Insert a toothpick and if that comes out clean, your cake is ready. Rest is aside to cool. 


5. Now when the cake is cooled down, slice is into half (horizontally). Make a syrup of strawberry, water and sugar. Spread it over one slice of cake. 


6. In a bowl, beat heavy cream until it forms stiff peaks. Now add vanilla and sugar. Don't over beat it, then it will become like butter. Spread half of the whipped cream over the strawberry glaze. I know what you are thinking, we can just dig onto the cake at this stage, haha you are absolutely right then! Isn't it looking amazing? 


7. Last but not the least, close the lid (with the other half of cake). Spread the remaining whipped cream over top of the cake with a spatula. 


8. Refrigerate the cake for an hour to set.  


When it's time, slice a generous piece out and devour in. It remains edible for 3-4 days but I bet it won't last in your fridge for that long! Enjoy!  

Friday, September 19, 2014

Breakfast Special: Sunny side Eggs topped with Hollandaise sauce & Pancakes!

Now this morning I thought lets play with our regular breakfast pattern. Weekdays are not meant to be special (:P) but as I had no class today, thought of making a breakfast platter for Mr. Him. I wanted to try making pancakes on muffin trays rather than the regular practice of making them on skillet. At the same time, it popped in my mind that I can bake the eggs in muffin tray too. The best thing about it is, there is almost no oil (just a drizzle at the bottom of the pan) and it's super yummy!
The recipe is given below. Hope you will enjoy trying these out during weekends! Happy baking, peeps!

Sunny side baked eggs topped with Hollandaise sauce & Buttermilk-Chocolate pancakes! 


Ingredients: 
For eggs:

1. Eggs- 2
2. Salt & pepper- taste wise 

For Hollandaise sauce:

1. Egg yolks-2
2. Lemon juice (freshly squeezed)- 1 tablespoon
3. Butter- 1/3 cup (unsalted)
4. Salt- to taste

For Pancakes:

1. Pancake mix- 1 cup
2. Egg-1
3. Milk- 1 cup 
4. Cocoa powder- 1-2 teaspoon (for chocolate pancakes) 
5. Butter- 1 tablespoon (melted, optional)

*There is no strict rule for pan cake mix : milk ratio, when you feel it's a right consistency batter ( not too runny or too think, it should work fine). 

Process

1.Eggs: Preheat the oven at 350 F. Crack the eggs gently on a cup cake tray (don't forget to grease it) and sprinkle a bit of salt and pepper. 


2.Pancakes: Mix all the ingredients of pancake. Now separate half of the batter and cocoa powder. Pour 1/3 of the batter in the greased cupcake tray. Bake for 15 minutes. Check after 10 minutes to see if the pancakes are cooked or not. You can add a thin slice of butter on top for the last 5 minutes. Also, it depends on how you want the eggs to be baked (soft or hard). 

3.Hollandaise sauce: Whisk the eggs yolk and lemon juice with a firm hand until it doubles in volume. Next, put a bowl over a saucepan with slight boiling water (you can also use double boiler). Please remember the bowl should not touch saucepan. Also, if the water it too hot, eggs will be cooked. Now, add melted butter gradually and continue whisking (you may ask for a helping hand, haha). Keep whisking until it thickens . Add some salt and pepper. Taste, and gently keep it in a warm place (until use). If the sauce becomes too thick (for resting), add a drop or two of warm water to recover the consistency. 


Place the pancakes on a plate, drizzle some maple syrup or honey over it.  Add your choice of fruits. For the baked egg, cut a pancake in half, place the egg and top with a generous amount of hollandaise sauce and chopped parsley. And... we are DONE! :)


Now, the reason I told you to have these kind of breakfast specially in weekends because it's a bit time consuming and contains A LOT of eggs (:P)... Make sure you hit gym occasionally to stay healthy! 

Note: Don't have pancake mix at home? No problem! Hit this link to make of your own: http://www.rachaelray.com/blogs/index.php/2014/05/24/make-your-own-myo-pancake-mix/


Have a lovely weekend with your loved ones, and if you are making something special for you loved one today, do share with me! It will be such a joy to share the happiness! Take care. 


Friday, September 12, 2014

Birthday Special: Triple Chocolate Fudge Cake with Buttercream Frosting!


Birthday Special: Triple Chocolate Fudge Cake with Buttercream Frosting! 

Hi dessert lovers, I am back after having a superb vacation back home, in Dhaka, Bangladesh. Now that I have joined Grad school from this Fall, I don't get time for baking like I used to get before. But I always look for a chance to bake! Yesterday it was one of our senior brothers' birthday here in Purdue, and on behalf of us (my fellow Purdue mates), I decided to bake him a birthday cake. I got to know about his birthday in the late afternoon, so didn't have much time in hand (bare me for my amateur frosting skills over this one), and as he is the lead guitarist for our local Purdue band here (The only Bangladeshi Band we have), I tried to make a small guitar out of the cake (Had no time to experiment with fondant)! I was very happy to see everyone's reaction to that guitar and on top of it, along the Birthday boy, when all of my friends said, it tasted divine, what more can I ask for? Here is the recipe for the cake and also for the frosting. Let me know if you have any feedback or improvisation ideas! 


Ingredients: 

For cake:

1. 2 1/2 cup all purpose flour
2. 1 cup cocoa powder
3. 1 teaspoon baking powder
4. 1/2 teaspoon salt
5. 2 cup milk (I prefer buttermilk)
6. 1 stick unsalted butter (if you are using salted stick, omit any additional salt from the recipe)
7. 1/3 cup oil (if using butter, omit oil)- I have used oil for this recipe.
8. 3 large Eggs
9. 1 teaspoon vanilla extract
10. 3 mixes of chocolate chips/chunks (I used milk, semi-sweet and dark)- 1/3 cup of each
11. nuts of your choice, I used walnut (optional)

***The cake pops (round cheesecake truffles are store bought as I didn't have enough time. But they can be made at home. For recipe, please google: http://www.foodnetwork.com/recipes/alton-brown/chocolate-truffles-recipe.html ***

Process:

1. Preheat the oven at 350 degree.

2. Mix all the dry ingredients first, mix with a fork, Now add oil and one egg at a time. Beat at a medium speed. Do not over beat it.

3. Now brush the 9'' cake pan with a bit of butter. Bake the cake for 50-55 minutes. (Depending on the oven).

4. After the cake is being baked, rest it for frosting. You can even cut it into halves and spread your choice of frosting. After spreading the frost, close the cake lid and rest it sometime before you frost the whole cake. "Always frost a cooled cake", preferable at the room temperature.

Note: 1. If you want a cake without frosting, please add 1.5 cups of sugar (approx. adjust to your taste), to the cake mix. If you are using any kind of frosting, please avoid this note.

           2. Always set a timer when you are baking a cake in the oven. It really helps!

Buttercream Frosting: 

Ingredients: 

1. 1/2 stick butter (softened)
2. 4 cup of confectioners sugar (For BD, you might want to blend your sugar until it forms like powder)
3. 1/2 teaspoon vanilla extract
4. 4-5 tablespoon milk (low-fat preferably)

Process: First beat butter until it's creamy.  Add sugar, essence and milk and beat until you get your choice of consistency. That was easy, isn't it? Well, not for your hand though.. haha!

It will yield 2-3 cups of frosting.

Tired of regular frosting?

Add orea (crushed) or any kind of nuts (almond, pista etc), you can add a bit of lime juice to bring a tangy flavor. Don't worry, keep playing with the flavors! That's the fun and freedom to bake, ain't it?

Happy baking!

Wednesday, July 30, 2014

Eid Special: My all time favorite dessert: TIRAMISU !!!

Tiramisu means  "pick me up" or "lift me up". It is a popular coffee - flavored Italian dessert, made of ladyfingers biscuits (origin:Italy) dipped in coffee, layered with a whipped mixture of eggs, sugar and mascarpone cheese, finally flavored with cocoa. Now the issue in question is these ingredients are quite delicate and can not be readily found in every grocery store. I went to three known superstores but couldn't find ladyfinger cookies so I decided to substitute them with wafers. For instance, I made my own mascarpone cheese using butter, cream cheese and heavy whipping cream milk. Also, an elder sister of mine raised the question of halal:haram issue that we often face in States while getting the right ingredients. Thereby, I wanted to make tiramisu using ingredients that are readily available (the best substitutes of ladyfinger cookies and mascarpone cheese) and trust me, making tiramisu is not as difficult as you might think! 

Tiramisu


Ingredients:

1. Dark chocolate wafers - 4 packets
2. Egg Yolks-6
3. Vanilla essence- 2 drops
4. Whipped cream topping-1 package **(if you want to make it at home, whisk 1 1/2 cup of heavy whipping cream using a hand mixer for 10-15 minutes)
5. Expresso instant coffee mix -1 tea spoon
6. Warm water- 1 cup
7. Unsweetened cocoa powder- 1 cup
8. Sugar- 1 cup **(if it's powdered sugar, it's easy to incorporate)

For mascarpone cheese:
1. Butter- 2 sticks (melted)
2. Heavy whipping cream- 1/4 cup (*you can thicken 2-3 cups of milk to get the right texture of heavy whipping cream) 
3. Cream cheese - 1 package (8 ounces) 

Process: 

1. For making the mascarpone cheese, in a bowl, mix together butter, heavy whipping cream and cream cheese. It can be used and stored for later use.

2. Then, take boiling water in a cup and mix the expresso instant coffee mix and rest it aside for later use. 

3. Next, set a double boiler (if it's of round shape, it will be good) on a pan of boiling water. Add the egg yolks, essence and sugar. Keep whisking the mixture for about 10-12 minutes to cook the yolks. In the halfway, add 2 tbsps of milk to smooth the mixture. Let this cool completely at room temperature.


3.  Now, you can make the heavy whipping cream at home but I got myself a readymade whipped topping to save some time. If you want to make it at home, just take 1 1/2 cup of whipping cream and whisk it for 10-15 minutes until it forms soft peaks. Keep it aside.

**images of egg yolk mixture and the mascarpone cheese-whipped cream mixture.

4. Now in the egg yolk mixture, add the mascarpone cheese (or the substitute mentioned in the top section) and fold with a soft hand. Then add the whipped cream (point no.3) and make sure you do not beat this mixture but fold with a spatula in a really soft hand. You might find it tiring at times, but it will come together slowly. Just have a little patience with it! ;)

5. Finally. it's the fun time and that's the awesome part of making tiramisu. The Assembling Part! My hubby also got interested and helped me with assembling, just to note he is not that much into cooking!! Now, Let's dip the wafers in the expresso coffee mixture and place it in the serving bowl. 
                       

6. Take spoonfuls of mascarpone-egg yolk mixture and smoothly spread it over the coffee dipped wafers. Repeat the layer of soaked wafers and then again pour the final layer of mascarpone-egg yolk mixture.  So, in short, it's a wafer-cream-wafer-cream texture. You can add some crushed wafers instead of full size ones in the second layer of wafers (like I did) and shredded almonds too to add your own little touch. 


7. For the final stage, take some tablespoon of cocoa powder and dust a little bit of it through a colander just before serving. Refrigerate the tiramisu for 8 hours or more. For best use, make it a day before you need to serve it. The more it sets, the more it gets better, taste and texture wise.

Note: Many says, tiramisu needs wine to get that oozy flavor but it is neccessarily not true. It can be made without alcohol so now there is no such ingredients in tiramisu that we can not consume as muslims. 

Serves: 12-14 people.


Enjoy the restaurant quality Tiramisu at home with your loved ones. Make it for a special occasion because this dessert does reflect elegance and romance, haha!


Tuesday, July 29, 2014

Eid Special: Shahi Jarda!

It was my first Eid after marriage so I tried so make some traditional desserts! :)


Ingredients:

1. Aromatic Rice-3 cups (I used Kalojeera)
2. Sugar- 2 1/2 cups
3. Jarda Color- 1 tea spoon
4. Ghee- 5-6 tbsps
5. Cardamom pods, Cinnamon sticks- 2-3
6. Almonds (shredded)- 1 cup
7. Mawa/Khoya-1 cup
8. Raisins-1-2 tbsp
9. Morabba- 1 cup
10. Water to boil- 6 cups
11. Orange juice- 1 cup
12. Orange peel- 1 tbsp
13. Dried fruits- 1/2 cup

Process:

1. Boil water in a pan. Add cardamom, cinnamon and the food color.
2.Wash and drain the rice. In the boiling water cook the rice until it is cooked but a bit firm. Keep the lid on.
3. After 10-15 minutes, drain the rice and keep it in room temperature.
4. Heat ghee in the large pan, add the rice and stir with a light hand for 1 or two minutes. Now add the sugar, some chopped almonds, morabba and raisin. Keep the flame low.
5. After a light stir, you can serve the Shahi Jarda immediately with nuts, khoya (mawa) and dried fruits of your choice. You can also add small sweets like the biye bari ones! :)


Serves- 10-12 people. Enjoy.


Saturday, July 19, 2014

Iftaar Special: Mini Lime Tarts!

It was my first ramadan in USA and lately we have been catching up with our friends through the Iftaar dawaats. Yesterday, we had invitation at one of our dear friend Sharly's house so I decided to bake something as cute as her. So I came up with the idea of Lime Tarts but the mini versions. Hope you would like experiment with mini bites like this one. 

Mini Lime Tarts 


Ingredients: 

For Tart shells:
1. All purpose flour- 1 1/2 cup
2. Sugar- 1/4 cup
3. Salt- 1/4 teaspoon
4. Butter (unsalted)- 1 stick (about 3/4 cup)
5. Vanilla essence- 2 drops (optional)
6. Cold water-2-3 tbsps

For Lime Tart filling:
1. Egg yellow-4
2. Custard Powder- 1/4 cup
3. Powdered or Caster Sugar- 1/2 cup
4. Full cream milk- 1 cup
5. Cold water-1/4 cup
6. Vanilla bean or essence- 1/2 teaspoon
7. Butter-2 tbsps
8. Lemonade (lime juice)- 1 cup
9. Lime zest- 1 tbsp

Toppings:
Cherry, Grapes and Papaya

Process:

For Tart Shells: 

1. In a food processor, combine butter and sugar. Now add the vanilla and water. In a separate bowl, shift the salt and flour and add to the butter-sugar mixture. Now mix on low speed until it forms a dough. 

2. Dump it onto a surface dusted with flour and roll it to a thin roti (flat disk). Now take butter brushed mini tart bakings cups or take the cupcake baking pans and press the dough firmly. Rest the tarts for an hour. 

3. Preheat the oven at 300 and bake the tart shells for 20 minutes. Make sure you put some rice on it to put the weight. After 20 minutes, prick the tarts with a toothpick and remove the rice. Now bake again for 20 minutes or until golden. 


4. Allow the tarts to cool in room temperature. Do not freeze them. 

For Lime filling:

1. In a bowl, mix sugar, essence. Add custard powder with the full cream milk.  Whisk it well. 

2. Beat 4 egg yolks, lemonade and cold water. Now mix it with the previous batter. Add butter and lime zest. 

3. Keep it string on a low flame for about 15 minutes. Then turn it onto medium flame. Add butter and lime zest. Keep stirring until it thickens and looks shiny. Leave it to cool. 


4. Pour the mixture (1 to 2 tbsps each) on each tart shell and make sure the tarts are on a tray when you are doing so. Leave it to set in fridge for 4 hours. 


Toppings:

1. Add seasonal fruits (I used Cherry, Papaya and Grapes). You may use whipping cream, white chocolate chips or even just a piece of lemon to keep it simple. 


Make someone smile this Summer with a version of your tarts!  Enjoy! 

Monday, July 14, 2014

A different version of Shemai: Shemai Borfi

With Eid-ul-Fitr being coming in 15 days, I thought of sharing a recipe I learnt from my Mami, and that is Shemai Barfi. The name might strike strange to you at first but yes Shemai can be cooked as a barfi sort of dessert with the same ingredients we use for regular Jorda Shemai. I hope you will enjoy being on the journey of going through my recipe and will give it a try soon , who knows, may be this Eid!

Shemai Barfi 


Ingredients: 

1. Vermicelli (Shemai)- 1 1/2 package 
2. Ghee/Butter- 1 cup
3. Condensed milk (Full fat)- 1 can
4. Nuts of your choice- I prefer Pista & Almonds- 1/4 cup each, to garnish

Process: 

1. First break the vermicelli in small pieces (crush them but do not make a powder out of it, haha!) 

2. Then roast the vermicelli in a dry pan until it takes the golden color. Now keep it aside. 

3. In the same pan, heat the ghee/oil (ghee is better for flavor). Then put the vermicelli back in the pan and give it a gentle stir. Let the ghee well coat the vermicelli in a medium flame.

4. Now pour the condensed milk and make sure you give it a good stir quickly as the condensed milk will tend to thicken and clot the vermicelli quicker than you think. Mix it well and make sure the heat is low. 

5. Now place the vermicelli on a baking tray or a flat surface. Sprinkle the nuts and cut the square or triangle pieces while it is warm through a sharp knife. Rest it for 30 minutes and it should be ready to serve in no time. 


*For round shape, take a mini dessert cup, pour a bit of vermicelli from the pan right after mixing the condensed milk, wait a minute and invert the cup on a plate. Then sprinkle the nuts! 


Serve- 15-20 people. You can store it up to 1-2 days because later on the condensed milk tends to crystalize and it doesn't taste great like the day 1. 

Enjoy!